Thursday, August 23, 2012

Inspiration overload!!


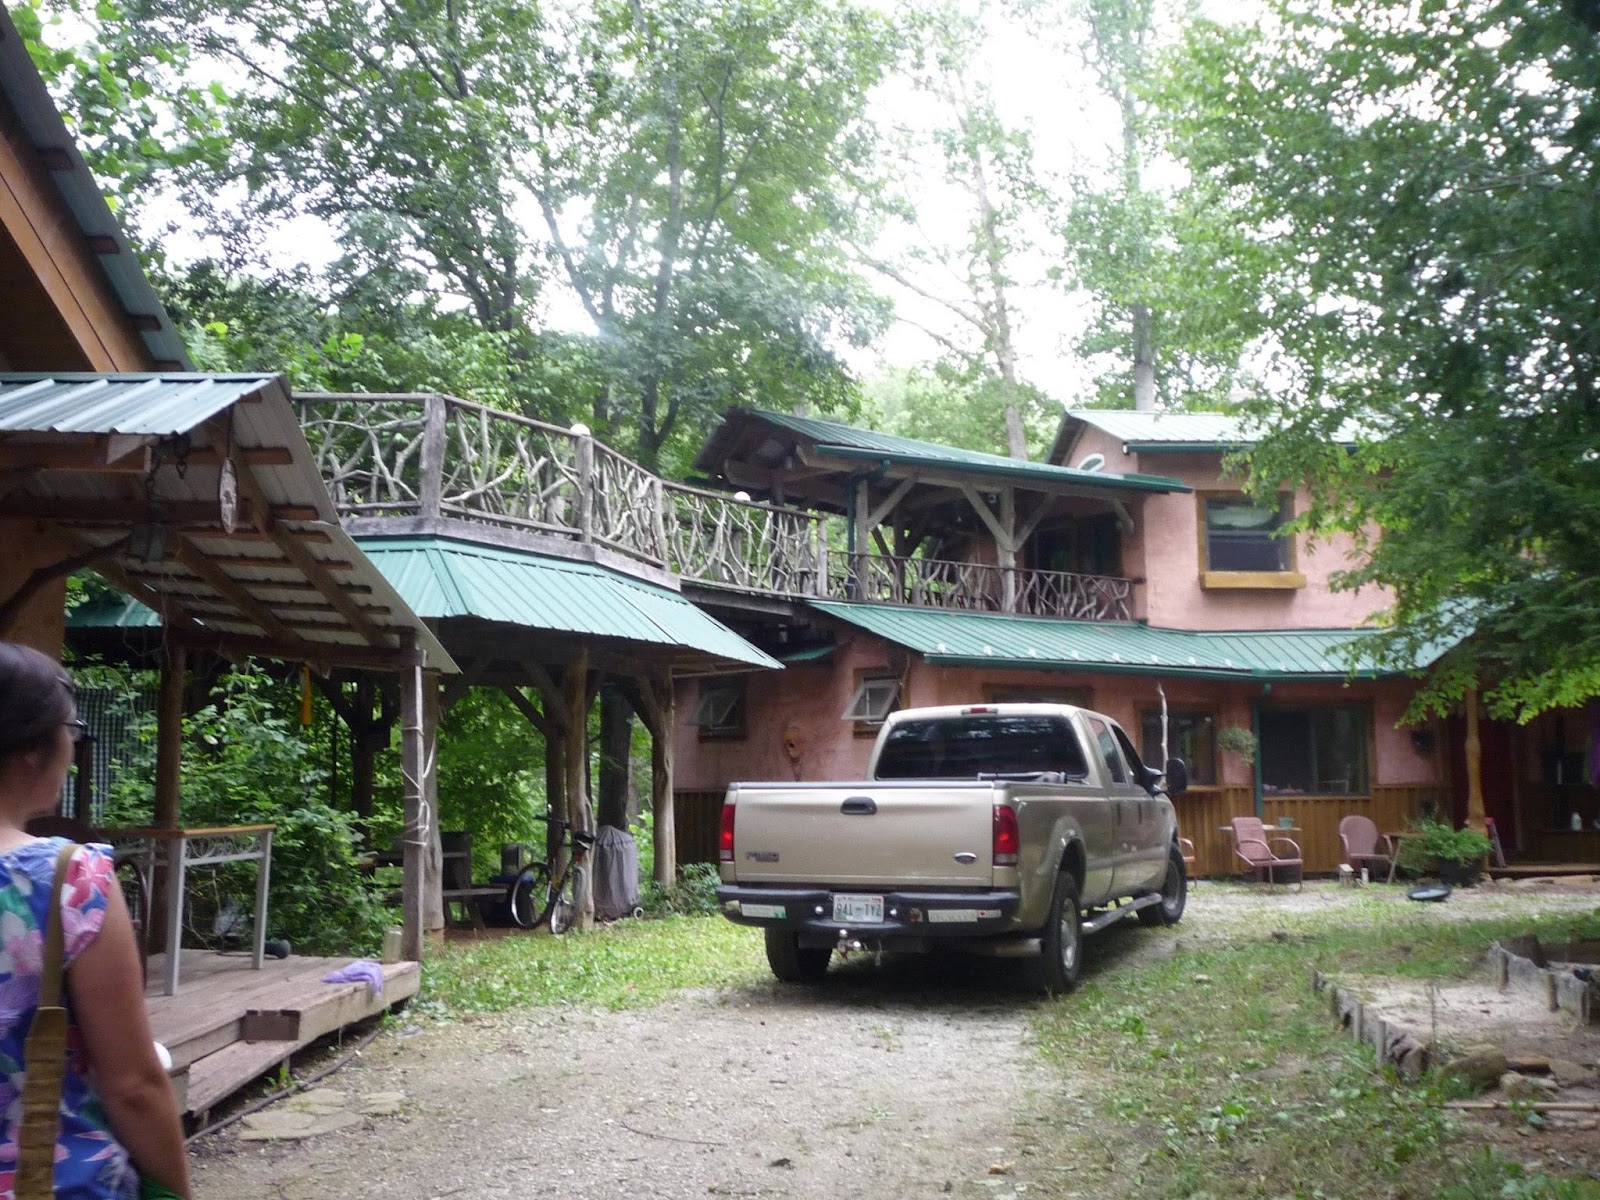
BEAUTIFUL natural built house at Earthaven (nice work, Steveo!)
I got lots of food for thought and inspiration last week, with both a tour of Earthaven Ecovillage and AsheVillage (the creation of Janell Kapoor of Kleiwerks in Asheville, NC). 

Super efficient earthen oven
Let’s start with AsheVillage because I’m obsessed with it.  So…basically this is the kind of place I would like to create in Austin or wherever I end up.  It is a natural building and permaculture demonstration site right in the middle of Asheville.  It is in an urban area, which makes it actually accessible to people and makes educating more and more people about the possibilities provided by natural building and permaculture a reality.  It is a collection of three adjoining residential properties right in a neighborhood that together make up an acre of land to work with.  On the front two properties are the (fairly large) houses that came with the property.  These have been lovingly redone by Janell and friends with natural plasters and finishes, vaulted and fun shaped ceilings, niches, and beautifully colored natural paints.  

Here are some photos from the front two houses (one of which is rented out as a guest house, which provides a revenue stream for the property…brilliant!):

One of the guest house bedrooms

Bright yellow walls in the dining room.  And bamboo curtain rods...I like that.

Storage niches

Then, there are the gardens and all the permaculture development of the site, which involves and extensive stormwater catchment and filtration system (under construction), an aguaponics system (where a fish pond and plant growing are linked with water and nutrients cycling through each and forming a symbiotic relationship…and you can eat the fish!!), water features, and tons of plants and herbs and flowers overflowing the property! 
More photos:

Trellis for plants to grow on, and behind it is the aguaponics greenhouse...so cool!!

Pretty water features!

Lots of trellised tomato plants
a work in progress, but still cool!
Lastly, there is a small natural built cottage/tiny house built in the back and plans for many more, plus plans to expand their current outdoor kitchen/tool shed into a full fledged outdoor kitchen with big windows and a porch with a view.  While we were there we talked about the idea of making small living spaces that are just enough to provide a place to sleep and some personal space, but don't encourage the habit of staying inside all day in our comfortable houses and never interacting with the world.  When our houses are so large and comfortable that they become a bubble we can live in, we are never encouraged by those spaces to go outside and interact with the world outside our house.  So instead, build small and then have separate buildings for your bathroom and for your kitchen (maybe even have an outdoor kitchen or communal kitchen).  This encourages going outside and being in community with other people.  I like that way of living so much!


Little cottage in progress!

OK, now onto the Earthaven tour!  Wow, that was fun too.  They have so much going on there!!  Huge 13-sided community building built like a yurt, lots of different creative natural built houses from tiny huts to very large creations, composting toilets, wood-fired sauna, and a beautiful home built by our workshop instructor Steveo that kind of blew my mind.  So beautiful.

Here are some photos (thank to Tan for most of these!):

Wood-powered sauna

Sweetest balcony/deck I've ever seen

Community house

Community house roof: built like a yurt!
Another Earthaven house  

 Hope you were inspired too!


Wednesday, August 15, 2012

What a beautiful community we have


Group hug!
New timber frame porch
What a beautiful week!  In all ways the Natural Building Workshop this last week far exceeded my expectations.  I had been sort of anxious about it due to all the logistics to pull together and all the new people to get to know and the nervousness about teaching…and of course once we got to it none of that turned out to be worth worrying about (is anything really worth worrying about?!).  It turned out to be one of the most exciting and inspiring weeks of the whole summer so far.

First of all, we had an AMAZING group of people for the workshop.  People came from all different backgrounds and all different ages and in one week we managed to feel like one big family.  People were incredibly courageous and inspiring to me in so many ways: in the kinds of sacrifices they made to be there, in their openness and willingness to be vulnerable with each other, in their beautiful visions of the kind of future they want to create for themselves and others.  It reminded me that I really am part of a much bigger movement, far beyond just this apprenticeship and this cottage build; a movement full of amazing and fun people that I get to stay connected to and inspired by for the rest of my life.

We learned a ton of new techniques this week too!  What a whirlwind!  I learned about base coat plasters, finish plasters, earthen paints, straw bale construction and detailing, adobe wall construction, chorizo (a straw-clay like wall system), wattle and daub, and more of the details of navigating building codes.

So here are some photos of the week:

Me talking about the cottage

Sarah showing how to install cedar shake roofing
Plaster mixing


We got to visit Earthaven Ecovillage for a super inspiring tour of the various natural buildings on the property, including a gorgeous house that our instructor Steveo built there:
Arjuna's beautiful house at Earthaven (built by Steveo)

Cob hut at Earthaven

The group at White Duck Taco in Asheville!

Sunday, August 5, 2012

Feelin' accomplished


Look at our cottage!!  It's got walls and a roof! (minus the slate...)


Straw-clay walls: done.  Bottle wall: done.  Roof decking: done.  Tar paper: done.  Nailers for slate: done.  Adobe blocks: done.

It’s been a busy couple weeks and it feels like we’ve finished a lot of big steps.  Our little cottage looks like a real building now!  It was starting to feel like we would be making and stuffing straw-clay in forms forever, but now we’re done!  Other than patching the holes in our wall (so…our straw-clay tamping technique wasn’t quite perfect), we are finished with the straw-clay portion of our building.


Taking off the formwork for the straw-clay walls

This next week is a BIG week for us here.  We are hosting an eight-day natural building workshop and have 30 people coming to stay here for the week.  It’s exciting to be having such an influx of new people (although a little intimidating to think of playing host to all those people) and to get to learn so many new things in one week.  By the end of the week we will have started plastering the cottage, have a timber frame porch on the front of it, an adobe garden wall made, some kind of sculpture/relief work on the courtyard yard side of the cottage, finish plaster on our cob oven, a second cob oven finished, a cob bench made, and a straw bale wall.

Here we go!!


Our adobe blocks!
Girls from the boarding school on Highland Lake that we had over for an adobe workshop.  They really got into it!!  (literally...)

Sunday, July 22, 2012

The Deluge, and other adventures

 Making straw-clay


Well, it’s been quite some time since I’ve written, and I blame the rain.  Yes, it’s all the rain’s fault.  No, but really, it sort of is.  It has been raining on the daily for the past two weeks.  First week it was pouring all day every day, then last week we got epic thunderstorms every afternoon around 4pm that turned the whole building site into a giant mud puddle and sent us scurrying to cover the building in tarps and protect all tools, belongings, and precious building materials (fully coated slip-straw is just straw when it gets rained on).  Also let I remind you, I live in a tent.

So how has this stopped me from writing blog posts?  Well, it hasn’t, but it’s a good excuse.  Let’s just say I’ve been preoccupied trying to keep myself and my belongings dry and free of mold (the belongings, that is).  I have only partially succeeded (damn you mold on my clothes!)

But the rain has certainly not stopped us from getting a ton done on the cottage!  Since timber framing week we have:

Put up the rafters:


Made an earthbag (well, gravel bag) stem wall for our building, complete with sill plate on top, drip edge, and fencing material along the sides to stick plaster to later in the future:


Put cleats (parallel strips on the rafters to hold the lath) and lath (small wood strips that go perpendicular to rafters and hold up the insulation and also form the ceiling structure that we will plaster later) on the rafters:


Filled in most of our earthen floor.  Lots of dirt first to bring in up to grade, then gravel layer for drainage, then foam insulation (boo, our perlite and foam peanuts idea didn’t work), then vapor barrier (to keep moisture from the ground from soaking into our earthen floor), then sifted dirt with a little sand in it, tamped with a weighted tamper.  We’ll FINISH finish the floor at the very end!


Put up the framing for our walls.  Put in studs to hold door and window bucks, and future shelves.  These also break up the spans of wall into smaller strips so the straw-clay walls don’t have to span so far.


Made formwork for holding the straw-clay materials as they are tamped into the walls.  The formwork is pieces of 2x8 ft plywood that is screwed onto the framing temporarily and then the straw-clay is tamped into these forms to create walls.  As we move up the wall, we move the formwork up with us.


Are half way done with our stray-clay walls!


AND in addition to all of that successful work, we have also made time to:
·      Try and use foam peanuts as floor insulation only to find they were too springy and have to take all the bags of them back out.
·      Not leave enough give in the vapor barrier for all the heavy dirt and have to re-tape all the edges.
·      Have the edge of the earthen floor get rained on heavily and have to remove all the wet mud in buckets
·      Make clay slip with too many clay chunks in it
·      Slip a bunch of hay before realizing it had seeds and was not the promised straw
·      Have rain wash dirt and mud into a lot of our prepared straw-clay
·      Over tamp the straw-clay walls
·      Under tamp the straw-clay walls

So you can see we’ve been busy.  Hooray for learning curves!  But despite all the rain and setbacks the building is looking awesome, the group has managed to get along throughout and maintain a positive attitude, and we are learning a ton.  And hey, the more mistakes we make, the more we will learn to never make those mistakes again.  Ah, perspective.

PS. i realize these photos don't make it look very rainy, but believe me when it was raining it was not the kind of weather to pull out a camera in!

Tuesday, June 26, 2012

Fun little introduction to our group


Here's a short video we did to introduce everybody and give a peek into our first week here.  (so first week was a couple weeks ago, but I take a while to get organized).  Katie and Emilie did the interview and I put it together with the titles and such on iMovie.  Yay teaching myself basic video editing!  (My more recent iMovie exploits coming soon with the video about our timber framing week).

Monday, June 18, 2012

We raised a house in 6 days!


This week was a crash course in timber framing.  By timber framing, I don’t mean nailing a frame together out of 2x4s.  I mean traditional wood frame joinery with mortises and tenons and wood pegs.  No nails.  No screws (ok, so I think there were 2 screws in the whole thing, just to hold the rafters together at the top). 


So we started on Monday knowing absolutely nothing about timber framing.  In 6 days, with the excellent guidance of our instructor Sarah, we learned new tools and techniques, measured and planned out locations and sizes of mortises and tenons, carved them out, cut out braces and posts and tie beams and plates, and assembled them on Saturday with a crew of volunteers to make our three bent frame for our cottage.
Our awesome, badass instructor, Sarah

It was a challenging week for the group, but we pulled together really well.  Lots of new information really fast, lots of long days (working into the evening with headlamps on Thursday and Friday), a lot of communication and teamwork necessary to make everything come together on Saturday.  And hey, we didn't even want to kill each other by the end!  I'd say that's a good sign for our group.

Gathered around for some instruction
But at the end of the week it was incredibly satisfying to see what we had made.  All the planning and detailed work and long days produced this beautiful, perfectly fitting timber structure that will be seen on the inside of our finished cottage and will be enjoyed for decades and decades. 

There was much good local beer drinking and music playing and singing and skinnydipping to celebrate :)  Perfect end to the week.

Here's some photos from the raising day on Saturday:

Laying out bents 1 and 3 (a bent is 2 posts connected by a tie beam)
More layout

Raising bent 1.  I am the one in the plaid shirt and the blue pants :)

Bracing bent 1 in place

Raising and bracing bent 2


All three bents up!

Bracing bents against each other.  The temporary braces will be removed later.

Look, temporary floor going on top of our floor joists!  Britt is excited about this...

Finished!!!  ...for now.